Soap Opera: Vanilla Sundaes

Panda and I got into making soap as gifts last year and the hobby has lain fallow since. But now once again, 'tis the season, and we've caught the bug anon. 

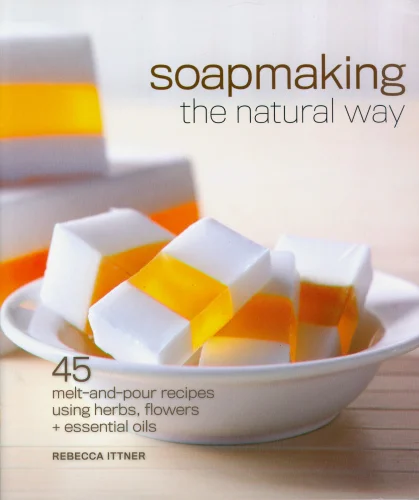
We're helped this year by this awesome book I found at Michael's, Soapmaking the Natural Way, by Rebecca Ittner. It's not hardcore, true pioneer, ashes-and-lye soapmaking, but apothecary fun of mixing glycerine soap blocks with essential oils and pantry ingredients to create very cool little soaps.

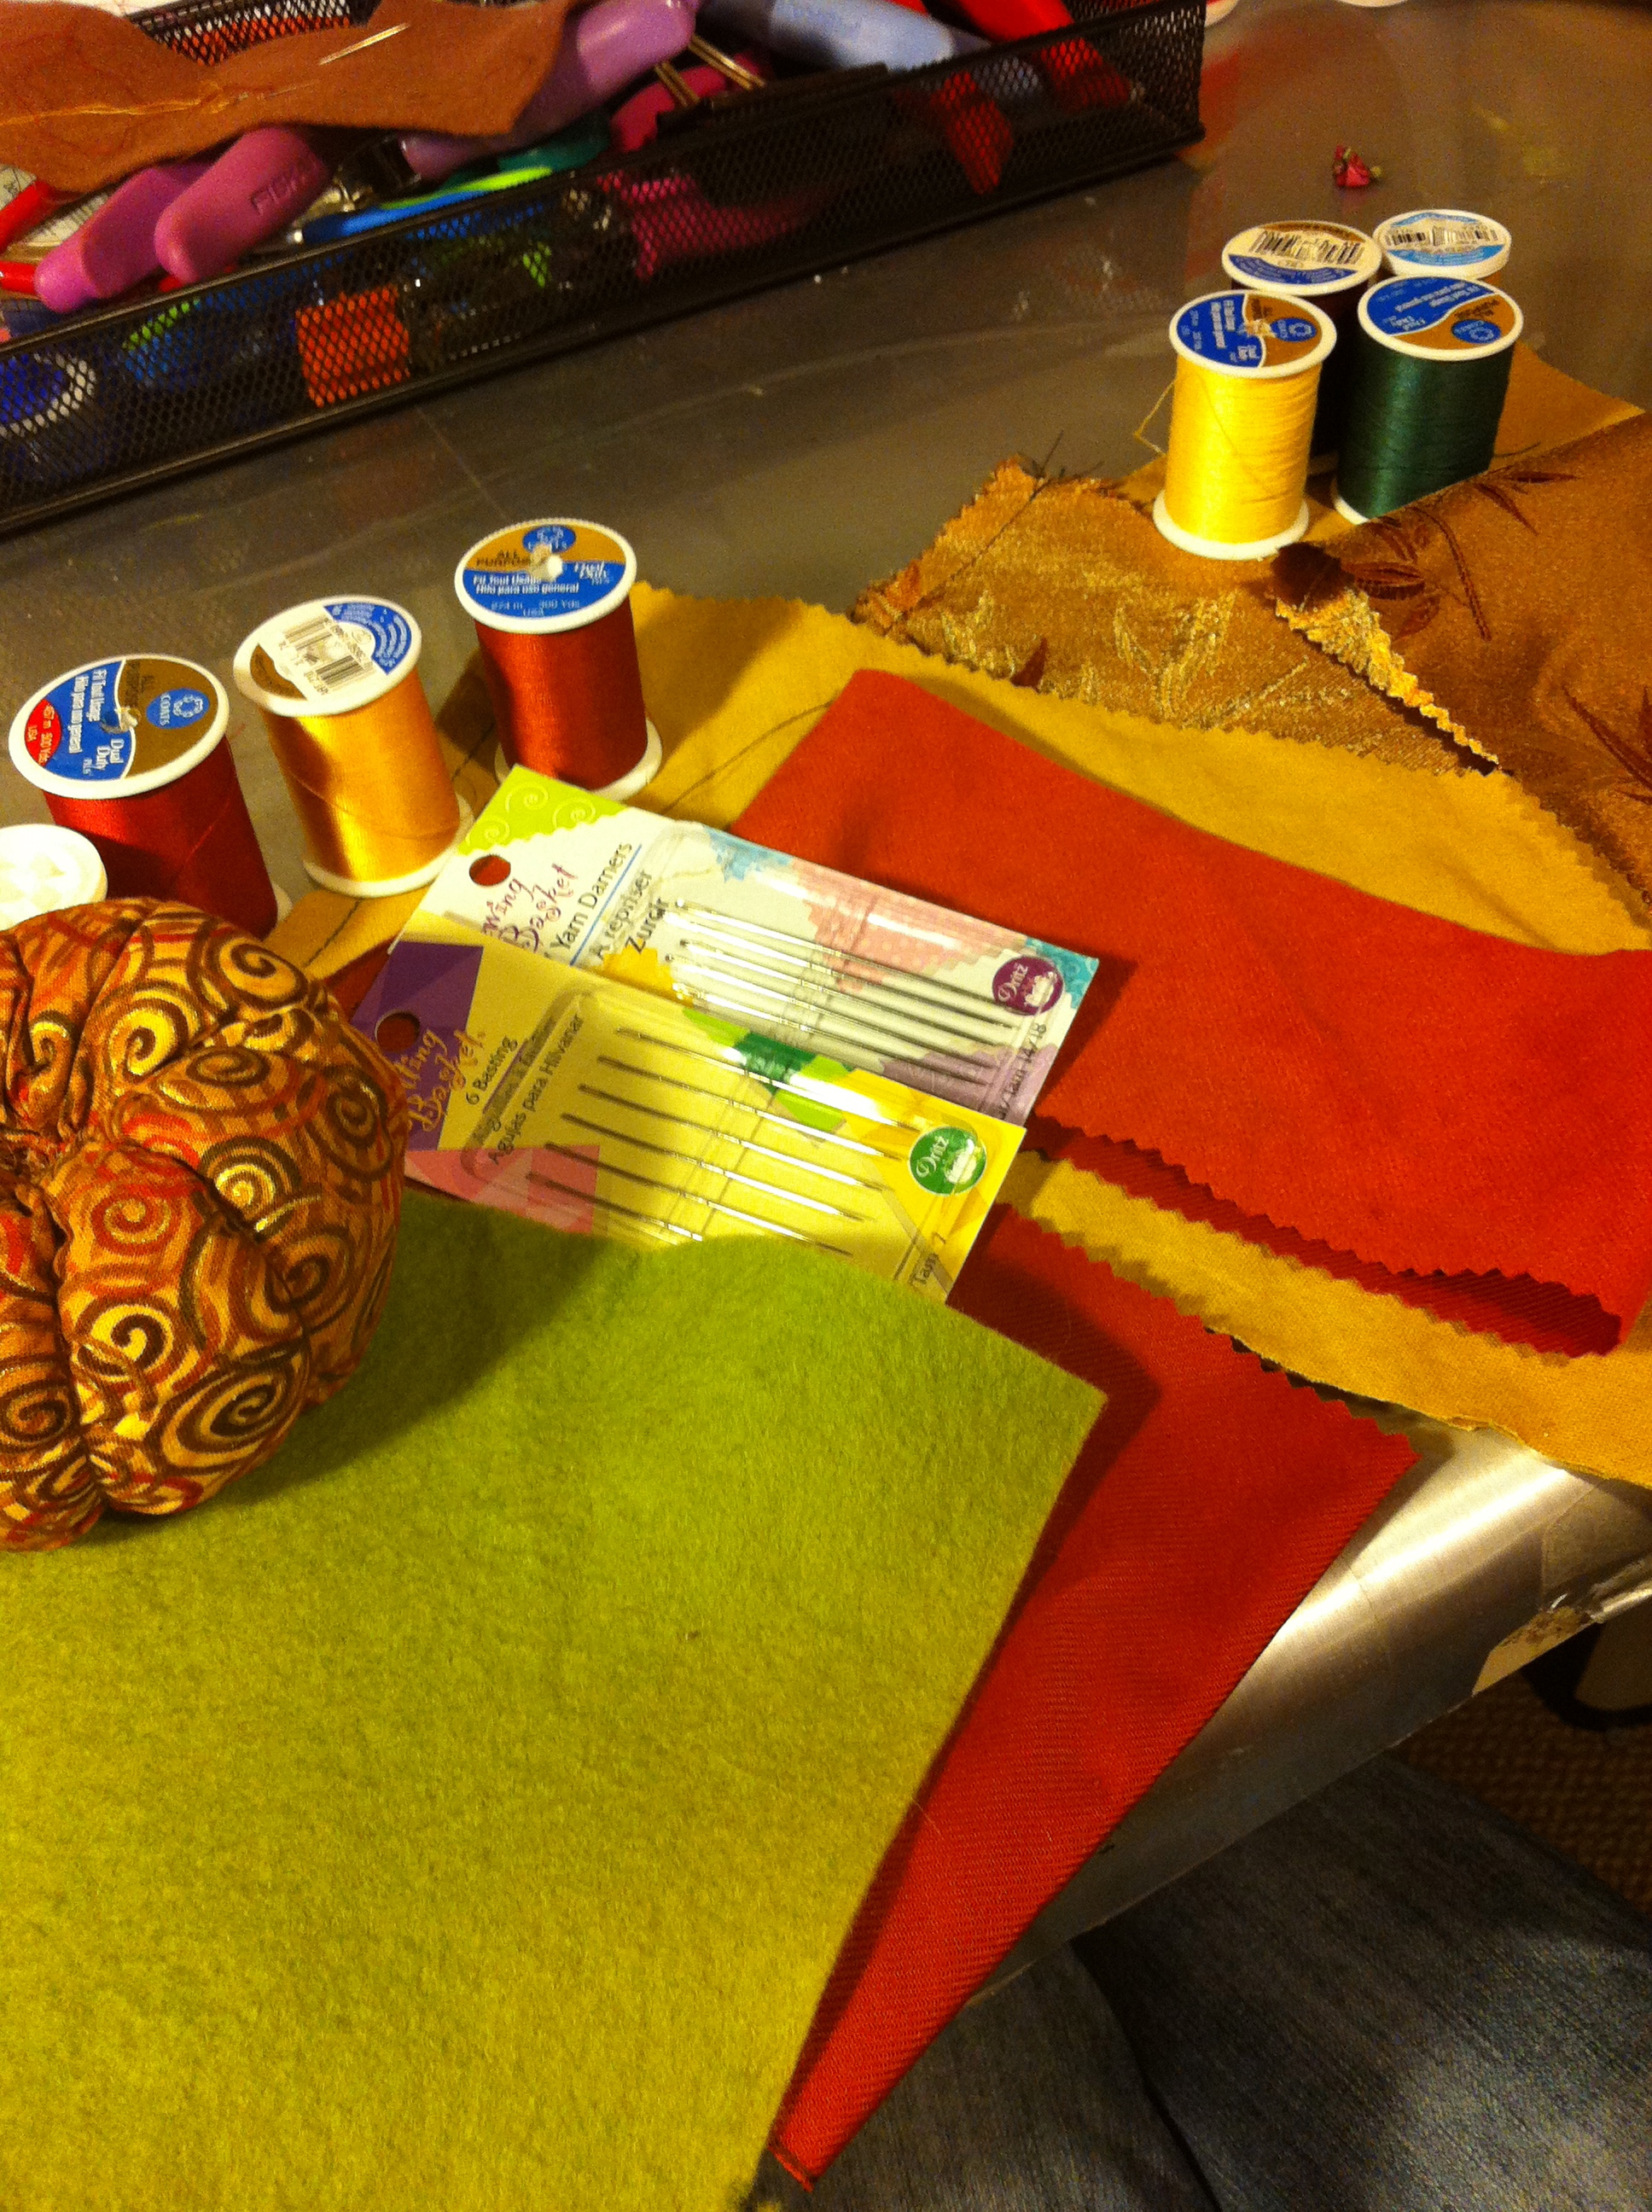
We went through and picked a few to try out, and I had to go in search of a few specialty ingredients, mostly the essential oils and things like kaolin clay or goat's milk powder. Essential oils at the local health food store were the rough equivalent of my monthly phone bill, so I hunted around online and found three sites that between them seemed to have everything we could need at pretty decent bulk prices:

Bramble Berry Soap Making Supplies

Bulk Apothecary

Essential Wholesale

I had all three open at the same time, comparison shopping, and in the end went with a few things from Bulk Apothecary and the rest from Essential.  After this recon, some soaps we wanted to make got rejected because the cost of their materials was just unjustifiable. Neroli essential oil? It's a mortgage payment, I'm not kidding.

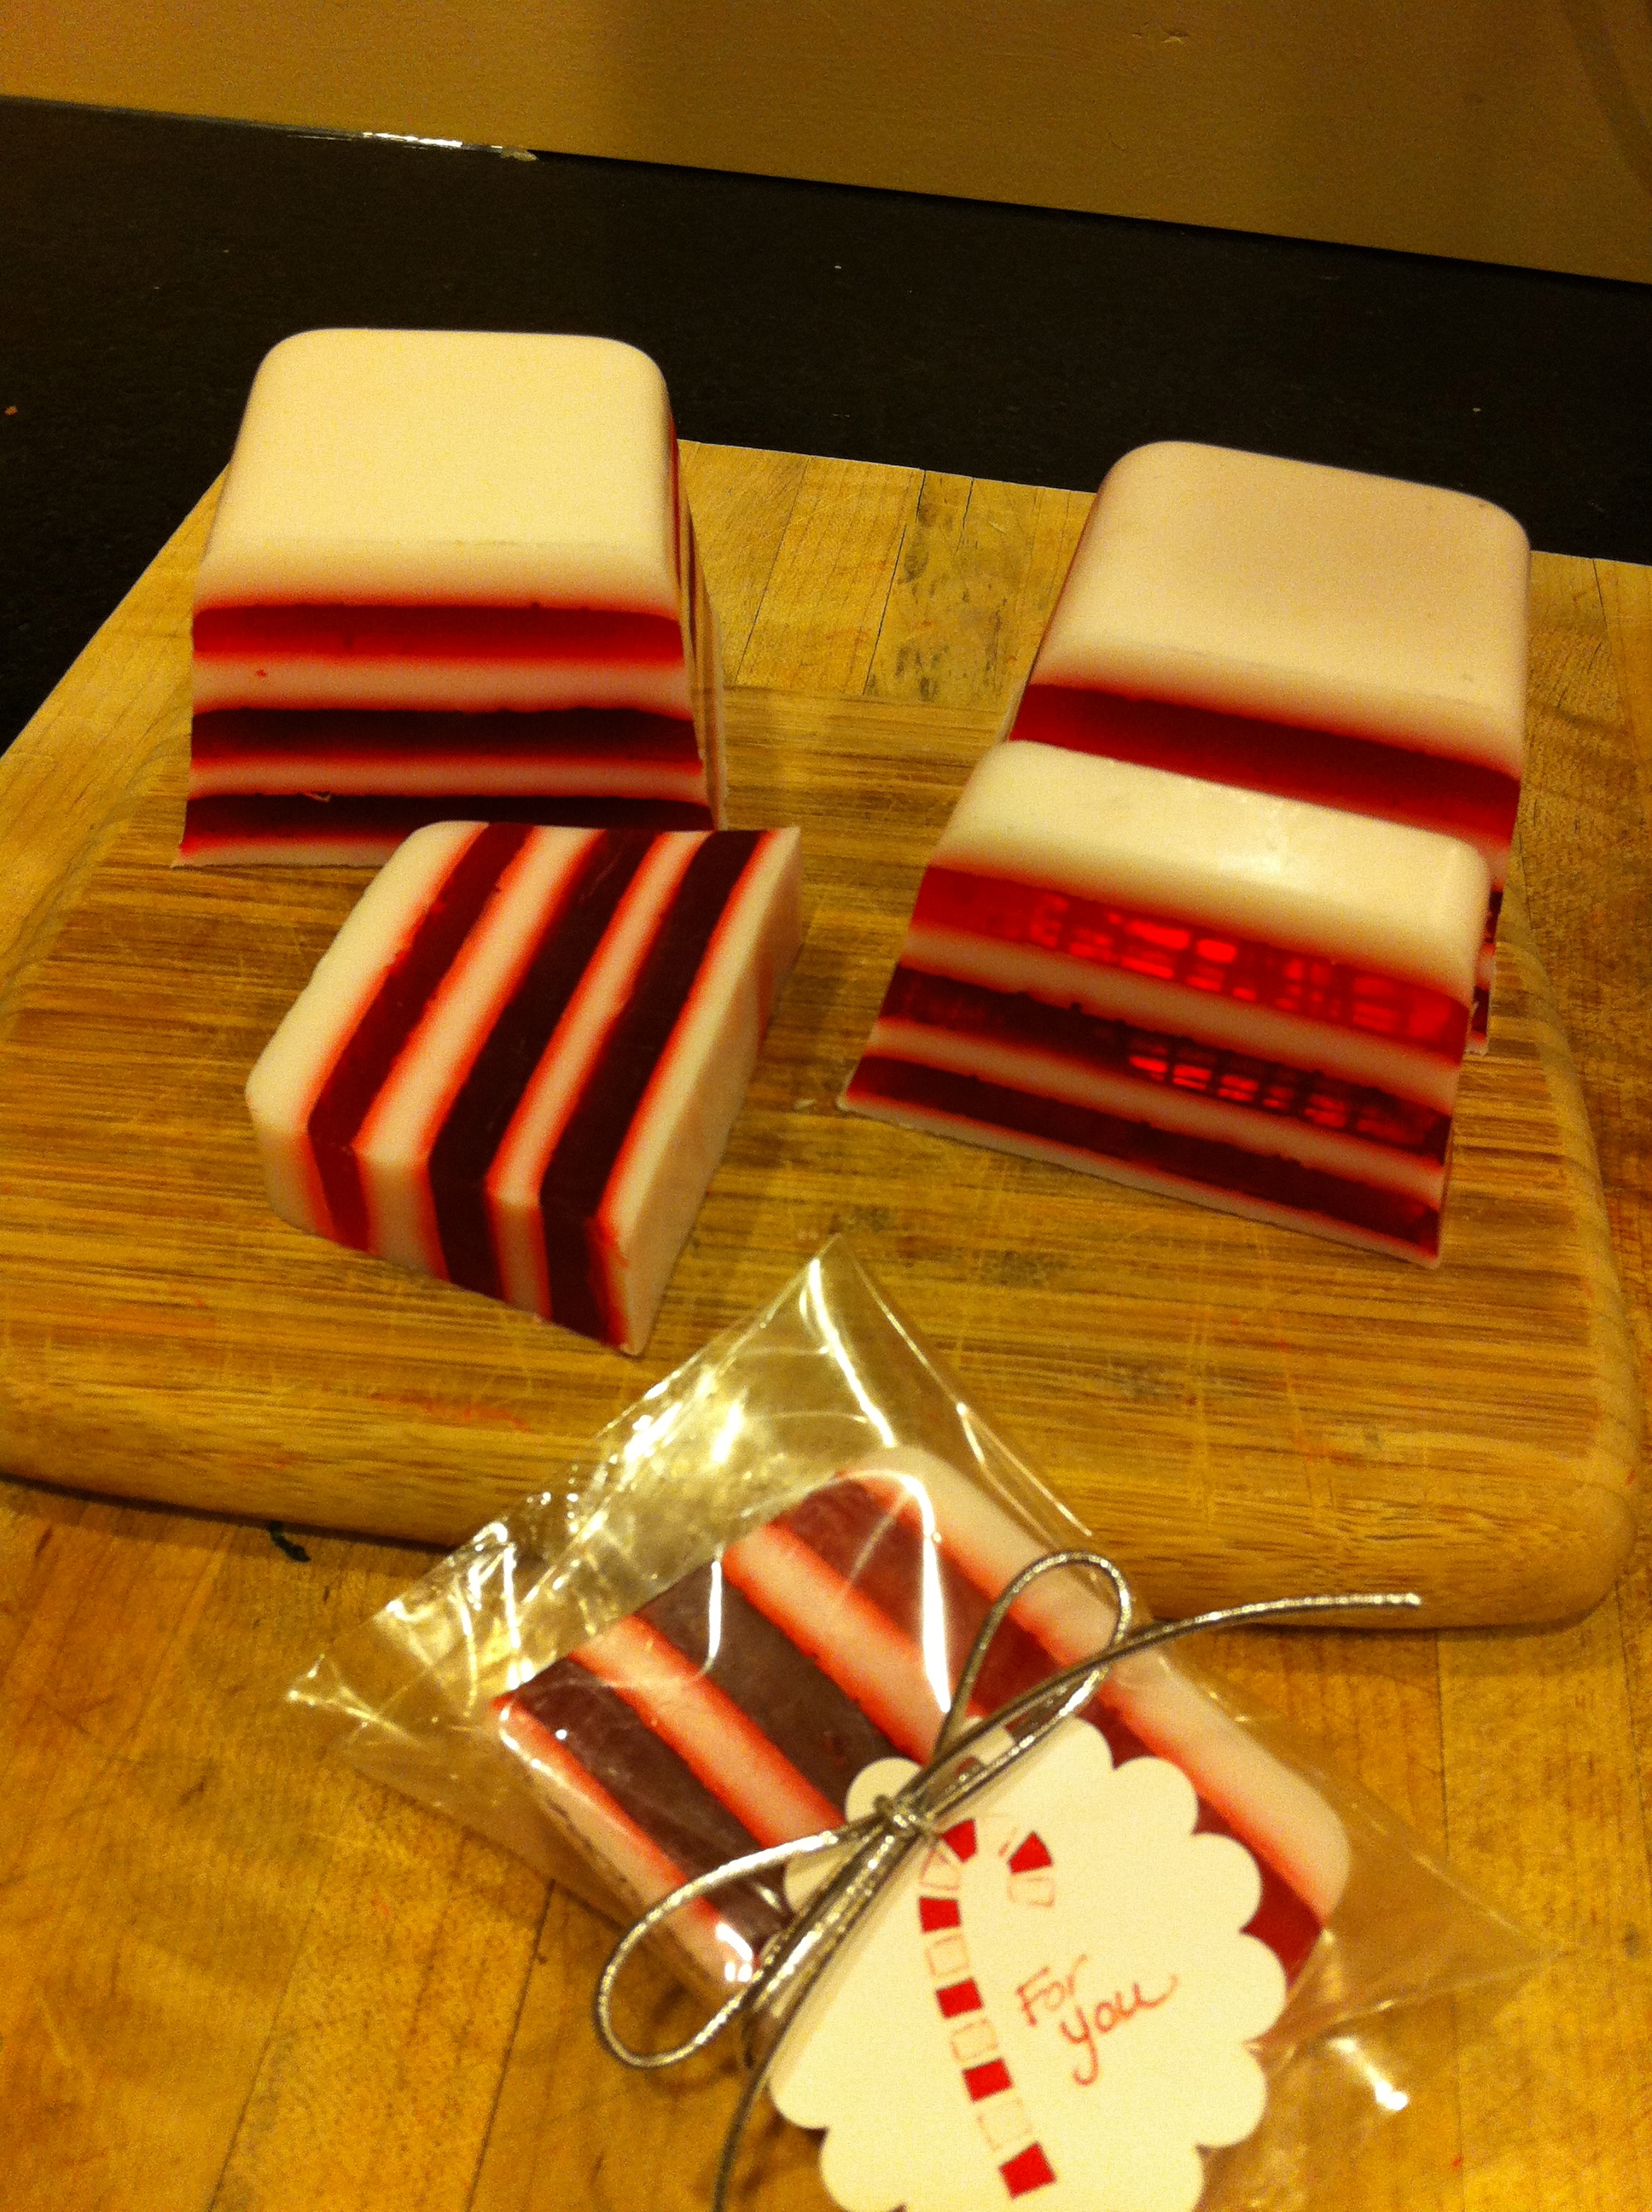
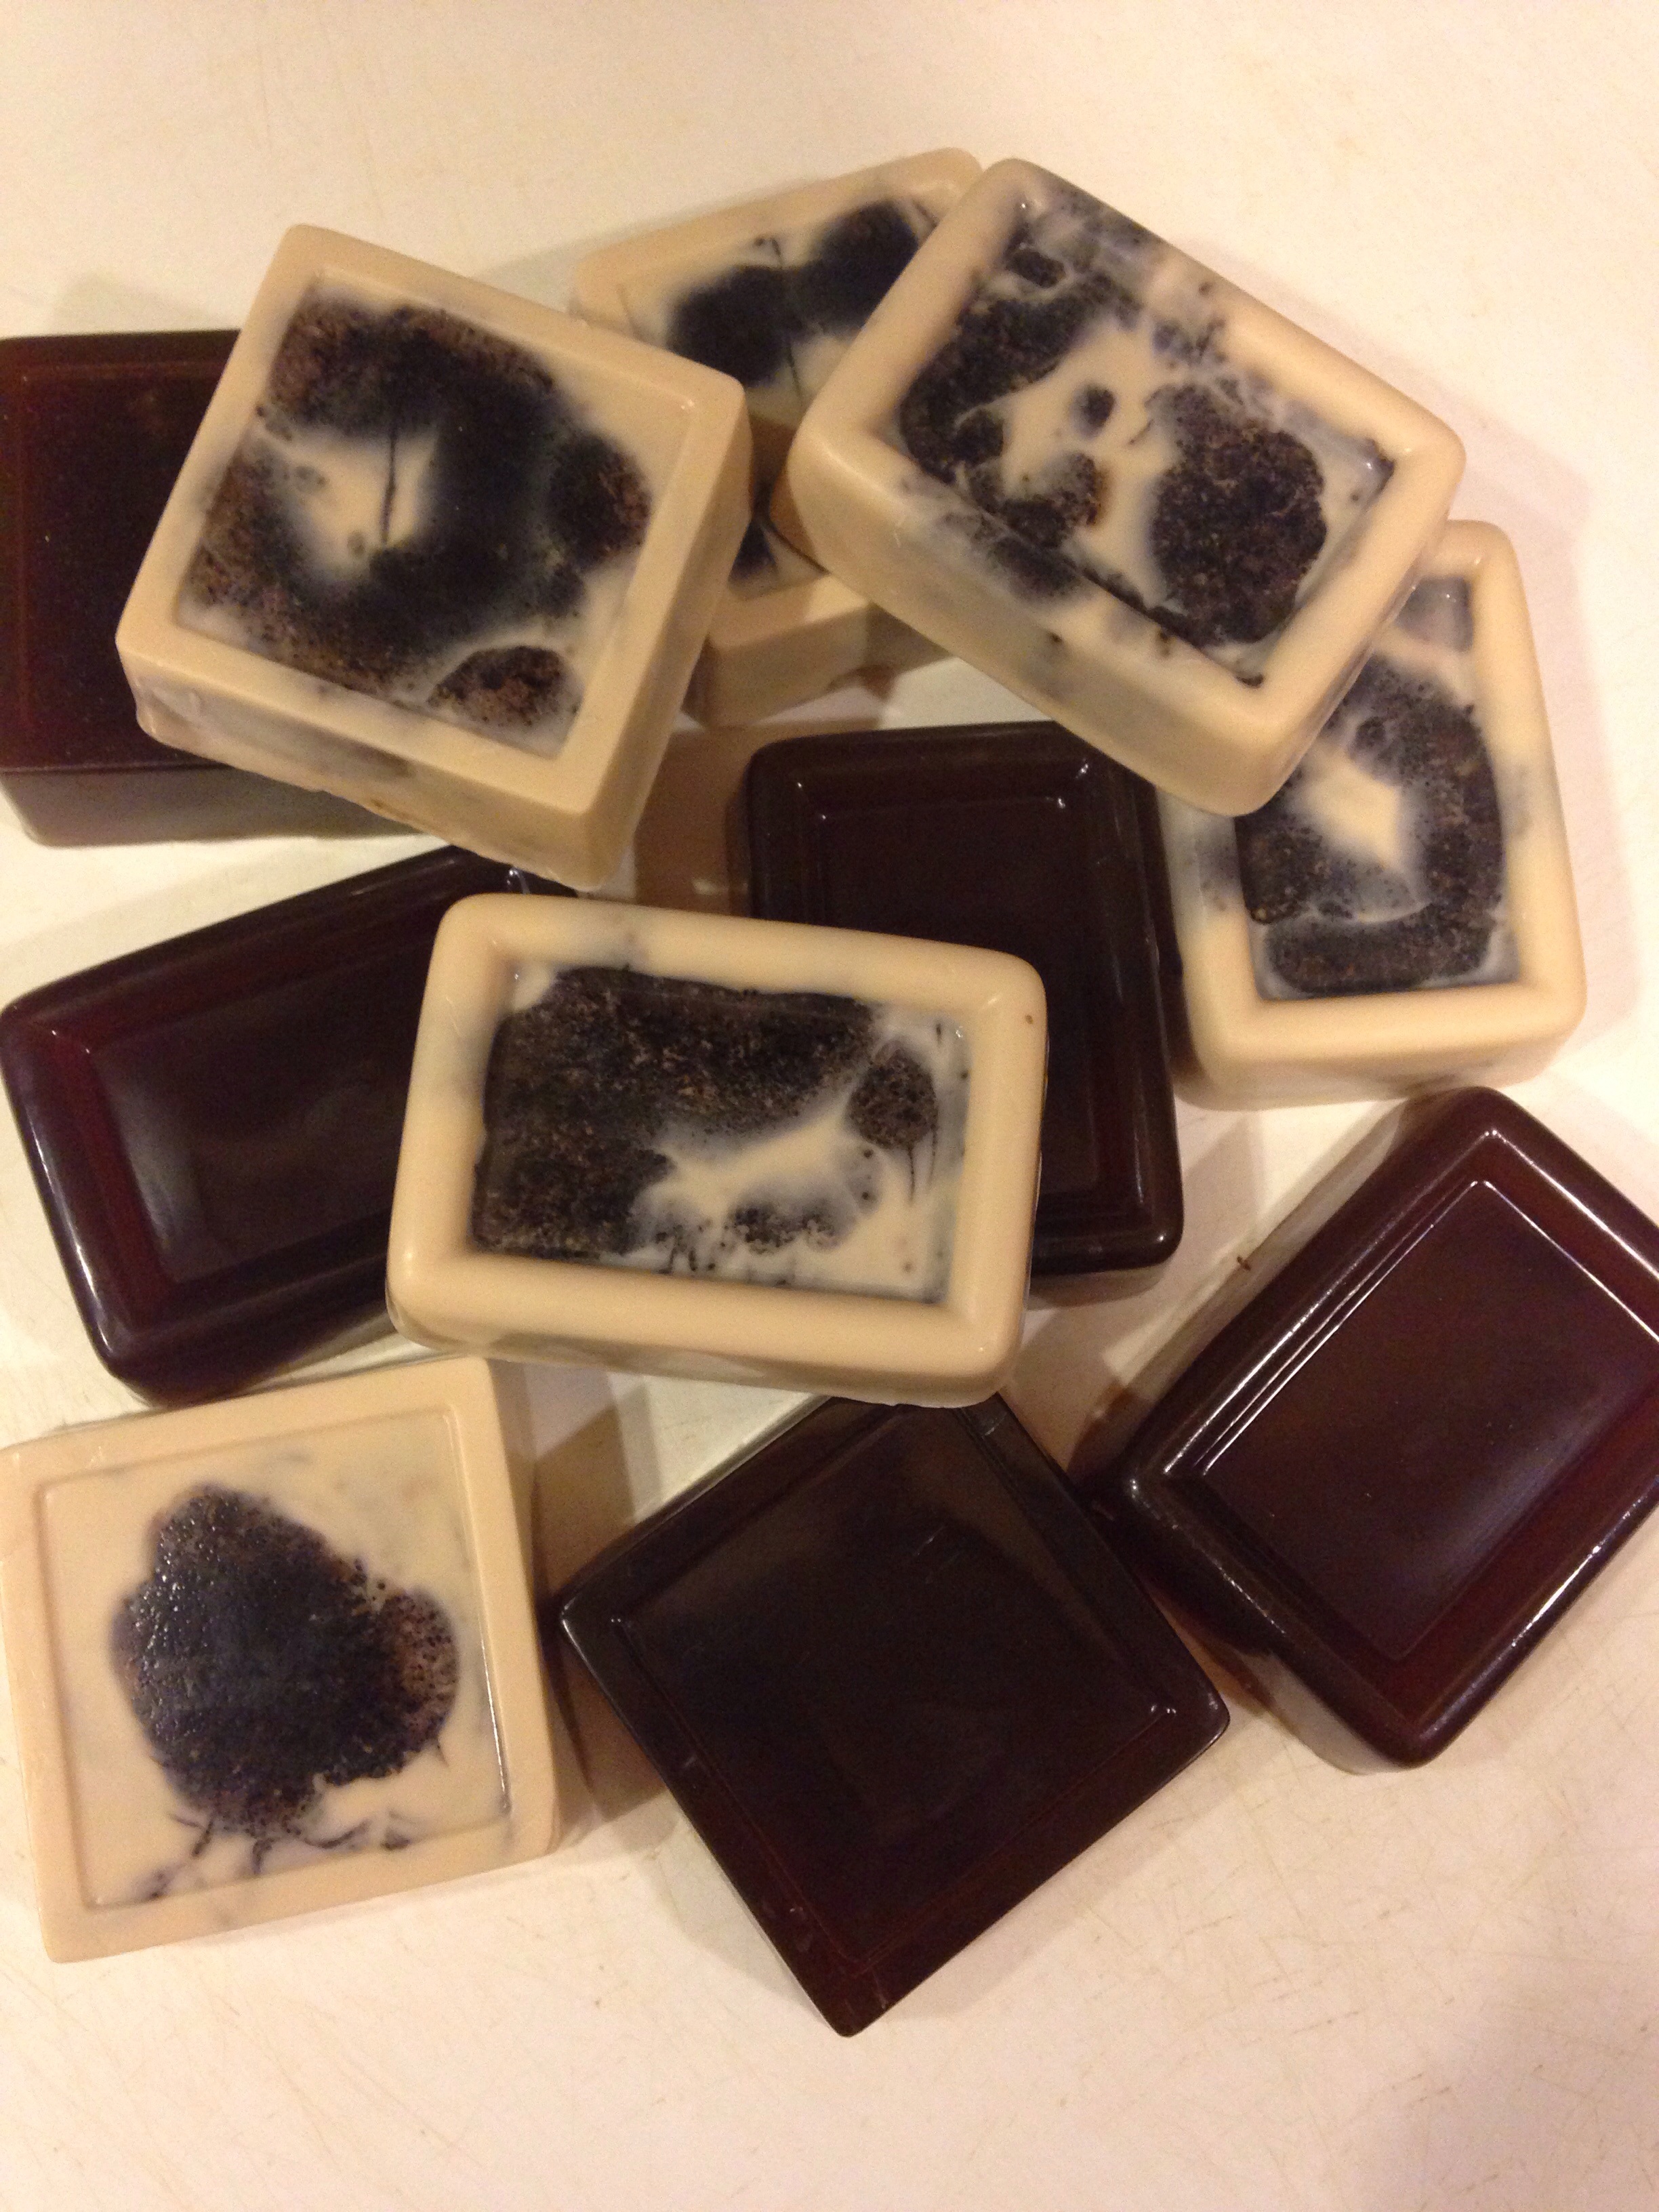
So a few things arrived in the mail on Thursday, we hit the test kitchens and have two soaps for you, one is a brown sugar vanilla clear soap, the other is a two-tone Vanilla Sundae.

Brown Sugar Vanilla

This is very straight forward melt-and-pour, and the additives are not specialized or weird.

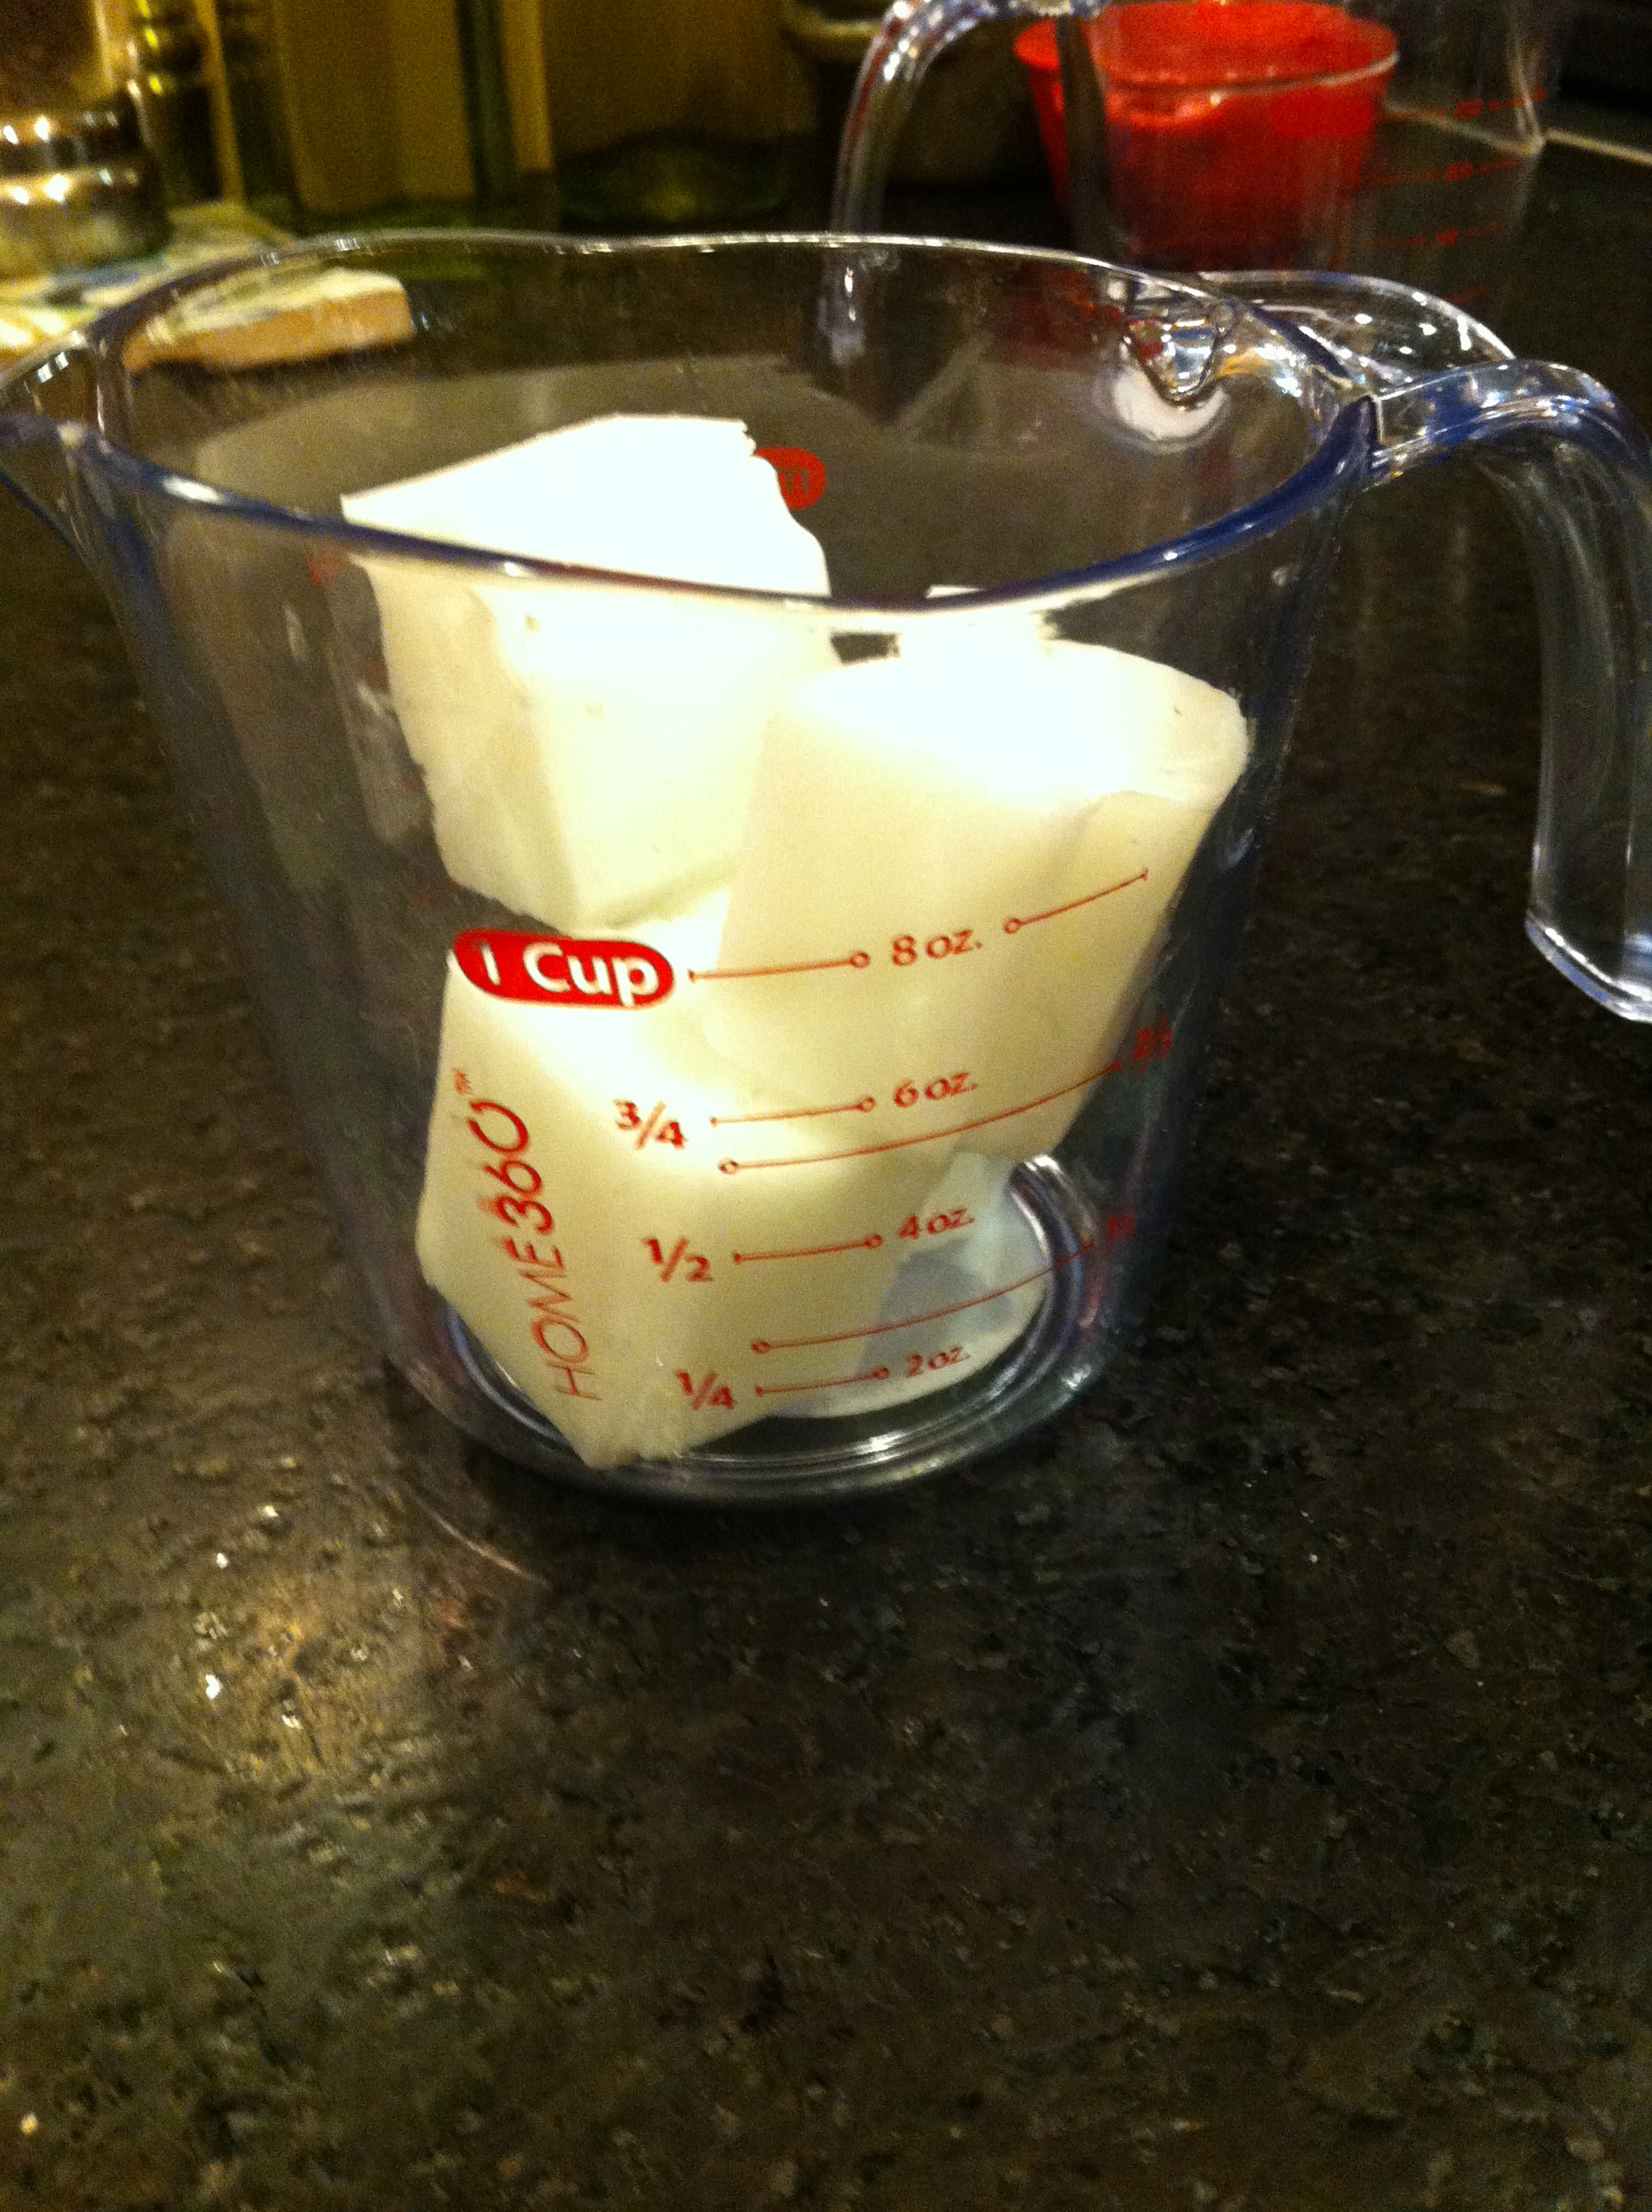
  • 1 lb clear melt-and-pour glycerine soap (I have been buying my soap blocks at Michael's, they come in a 2-lb package so this was half of it)
  • 1 teaspoon vitamin E oil
  • 2 teaspoons vanilla essential oil (on which many purists call bullshit, apparently there is no such thing as vanilla essential oil, and what you really get is a real glorified vanilla extract. It certainly looked like vanilla extract and cost about the same so draw your own conclusions)
  • 1 1/2 tablespoons brown sugar


  • Small spray bottle with alcohol (I found one in a little travel kit I had under the sink for some strange reason)

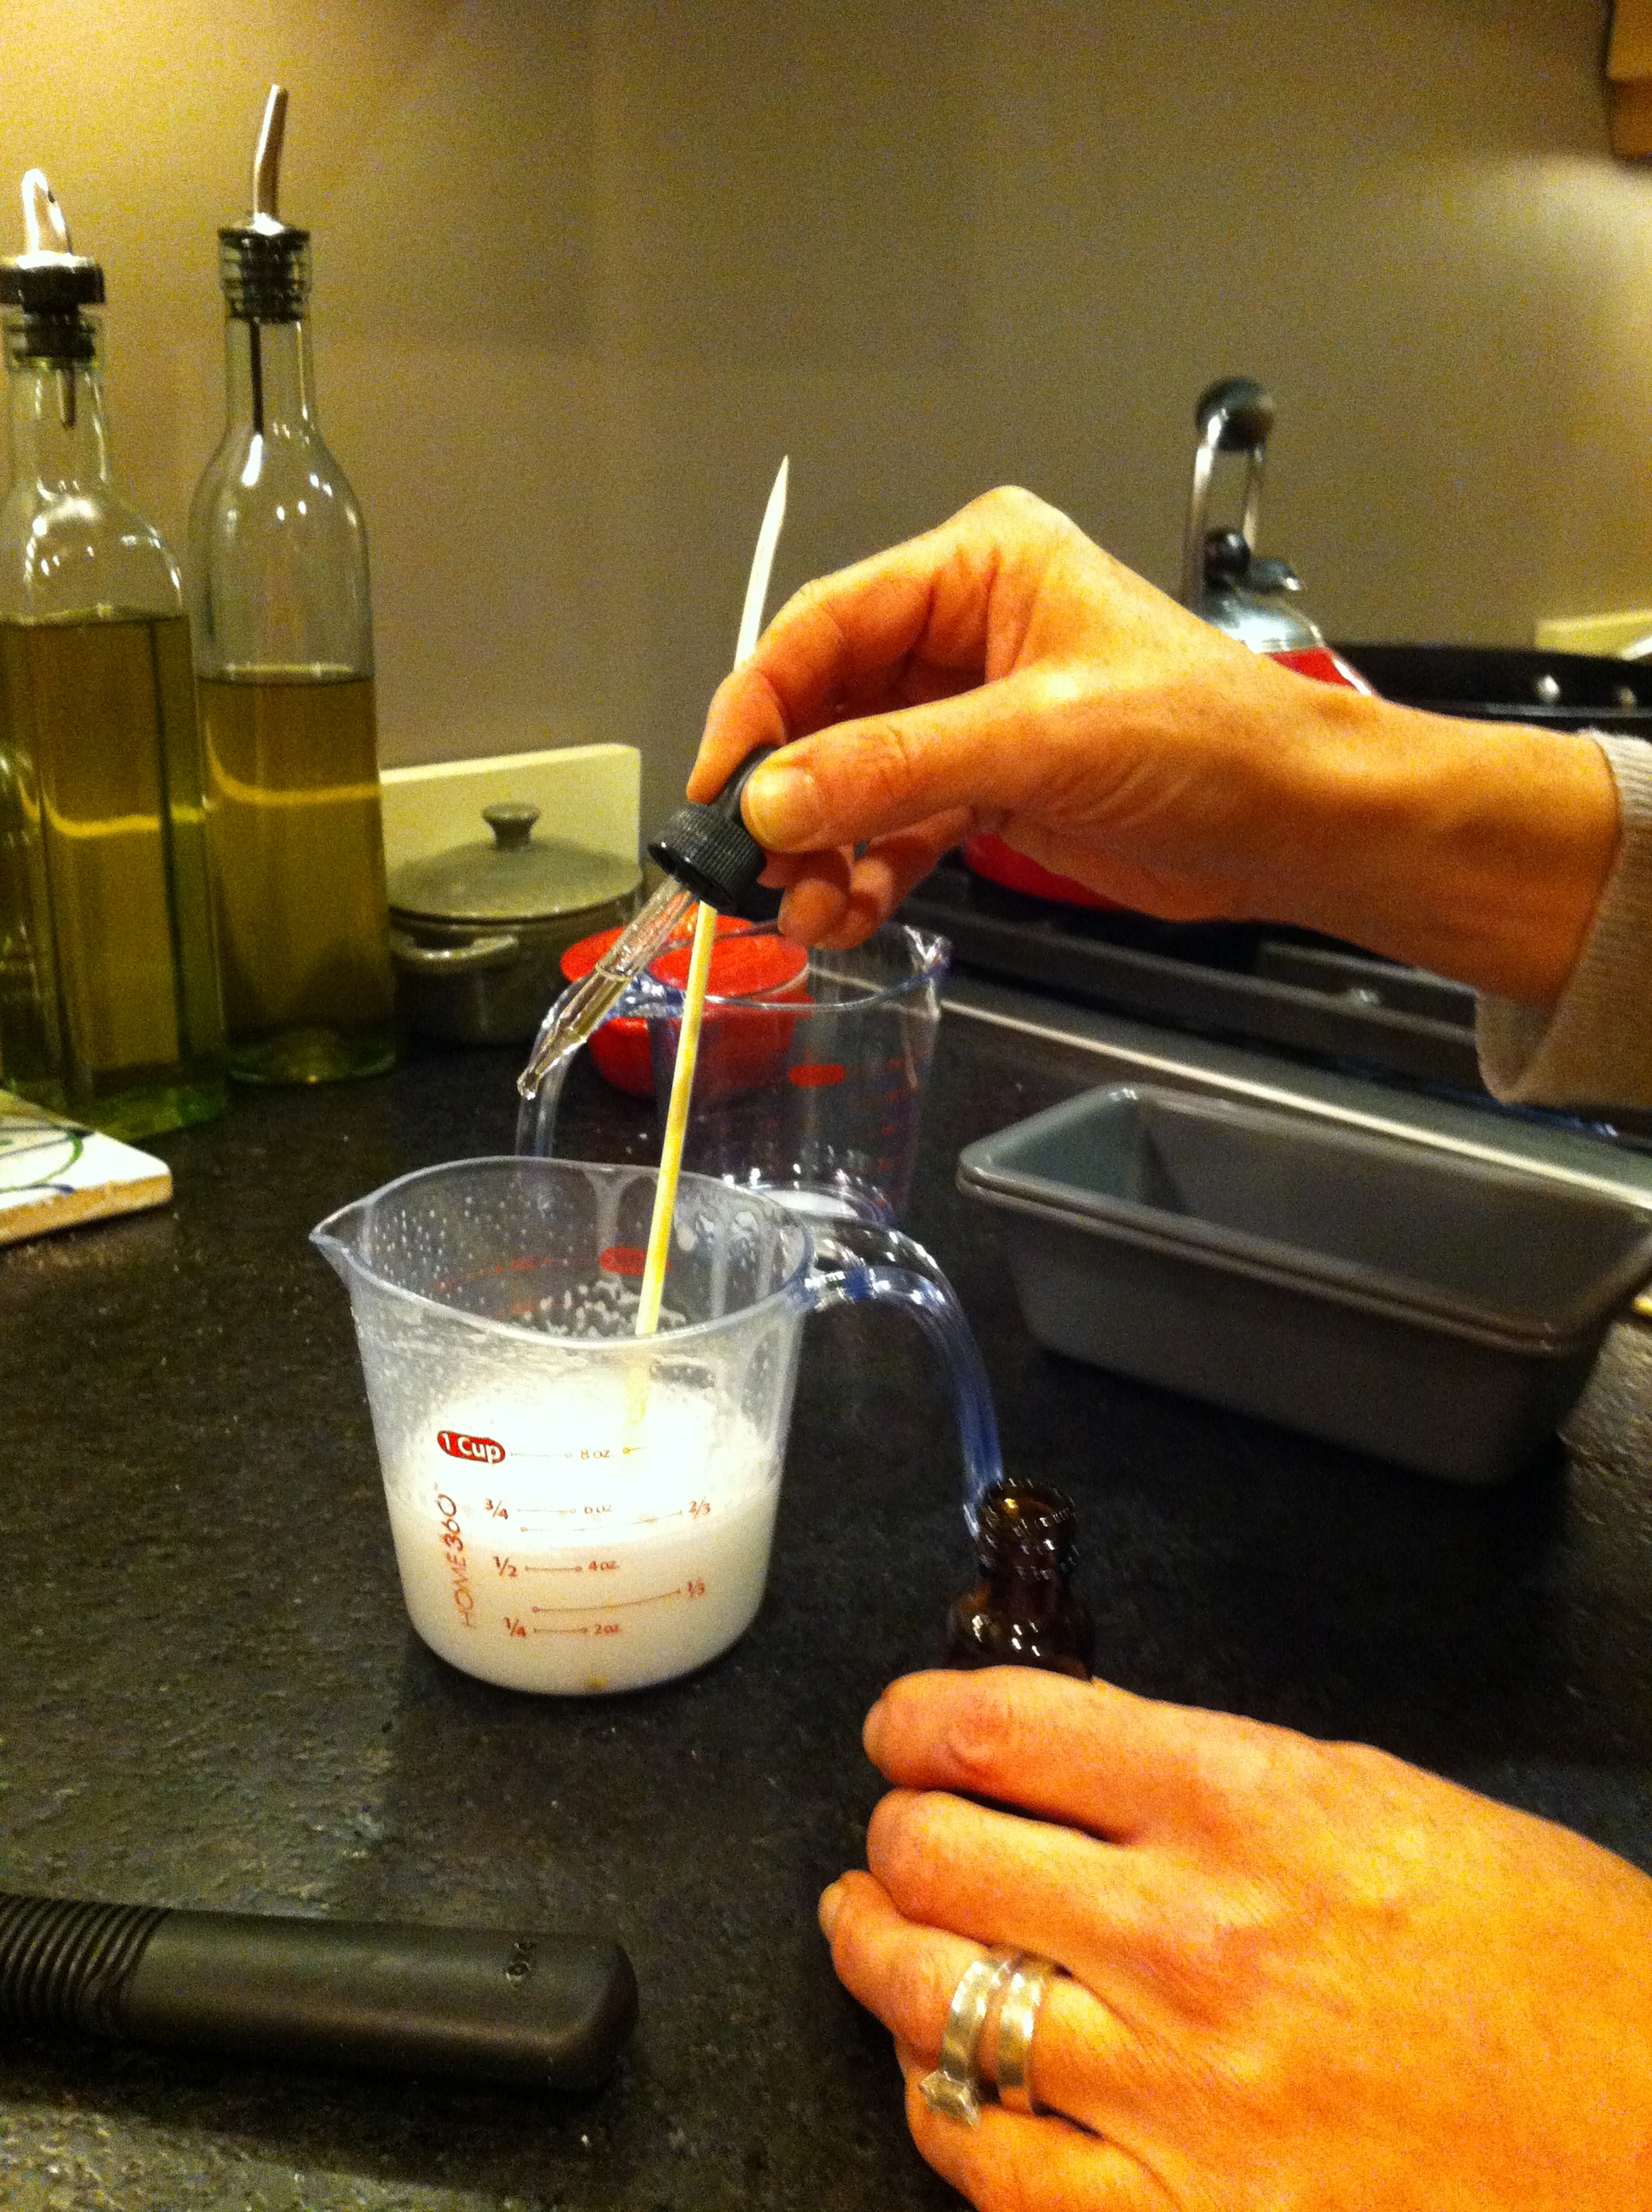
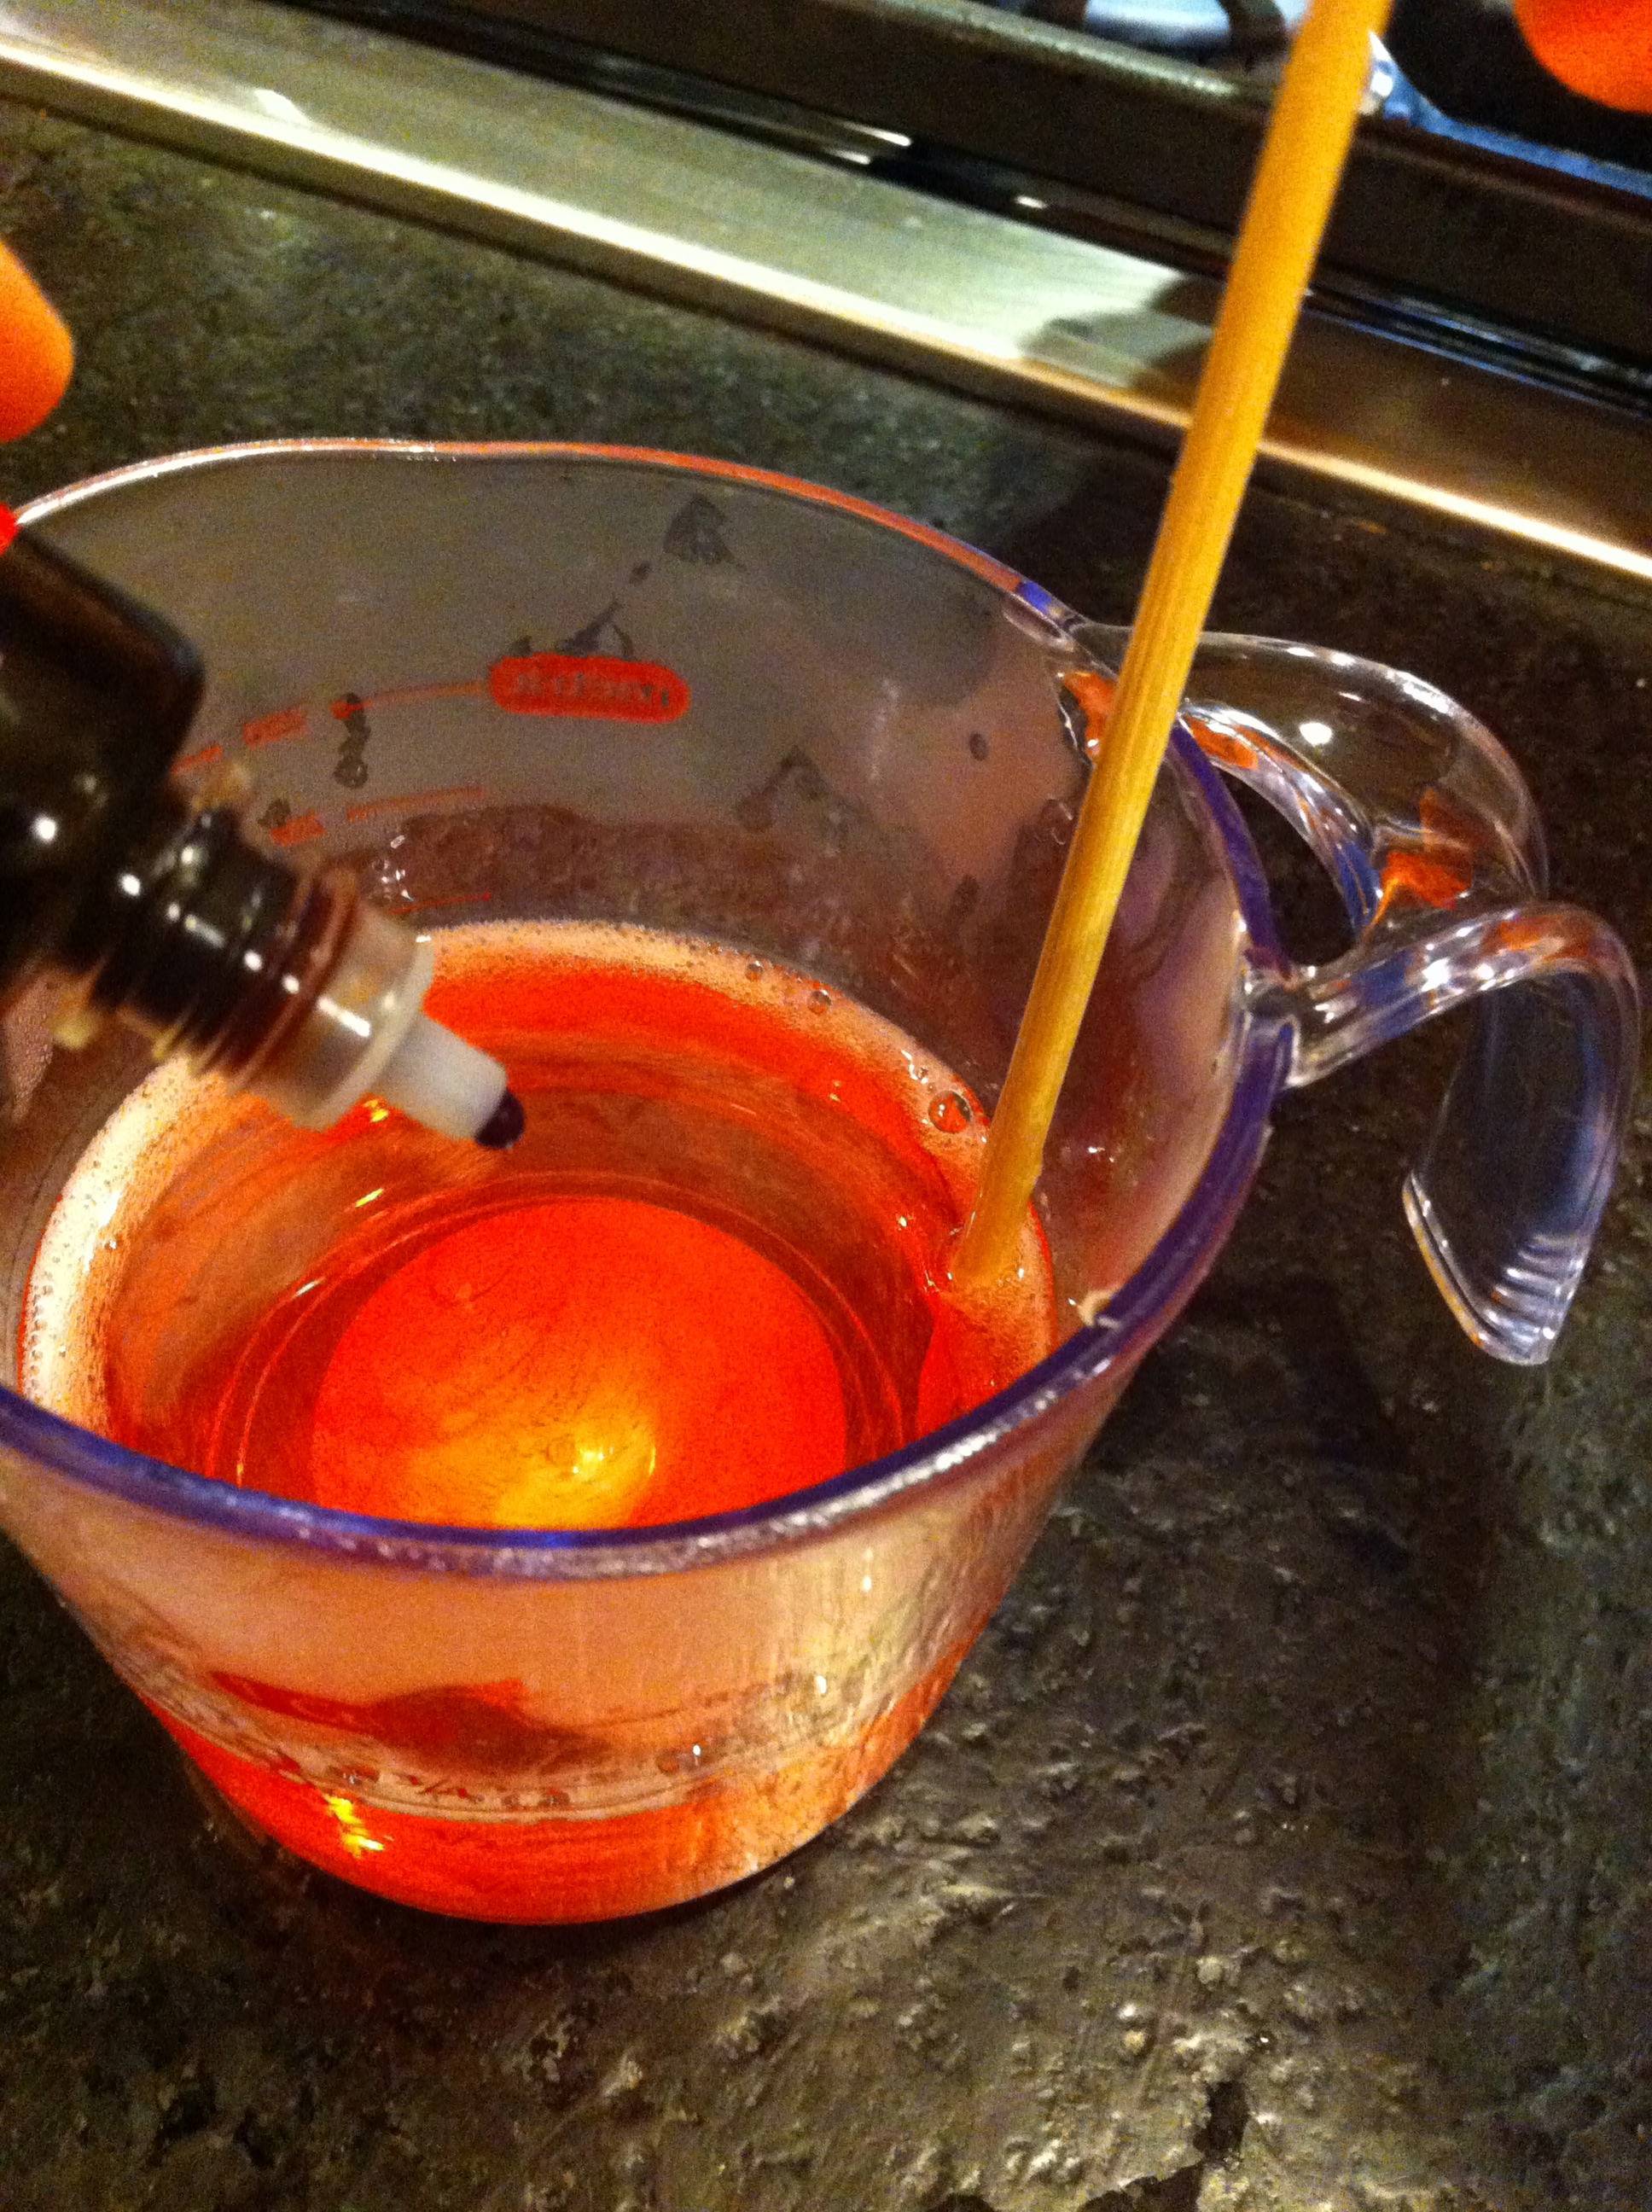
In a large glass or pyrex measuring cup, melt the glycerine soap in the microwave.  Stir in the oils and sugar, and then pour into molds. Spray the tops of the molds with alcohol to remove air bubbles. Let cool and fully harden, then pop out of the molds.

Vanilla Sundae Soap

This soap is a little more labor intensive because it has two layers. But it is gorgeous and smells amazing and really once you have everything set up, it's not a lot of time to make them. I have one at my kitchen sink and the other in my shower. They're really great, lather up nice, and the scent is just divine. And you made them, how cool is that?

White layer:

  • 1/2 lb shea butter melt-and-pour soap
  • 1 tsp sweet almond oil (this hadn't yet arrived so I used the vitamin E oil)
  • 1 tsp vanilla essential oil (cough, extract, cough)
  • 1 tablespoon goat's milk powder, dissolved in 1 tablespoon hot water and whisked smooth

Melt soap in microwave in large pyrex measuring cup or bowl. Stir in the oils and the goat's milk. Cover with plastic wrap and set aside while you make the second layer.

Clear layer:

  • 1/2 lb clear glycerine melt-and-pour soap
  • 2 tsps honey
  • 1 tsp cocoa powder

Melt the soap in the microwave, stir in the honey and cocoa powder. A whisk works best to get the cocoa fully incorporated.

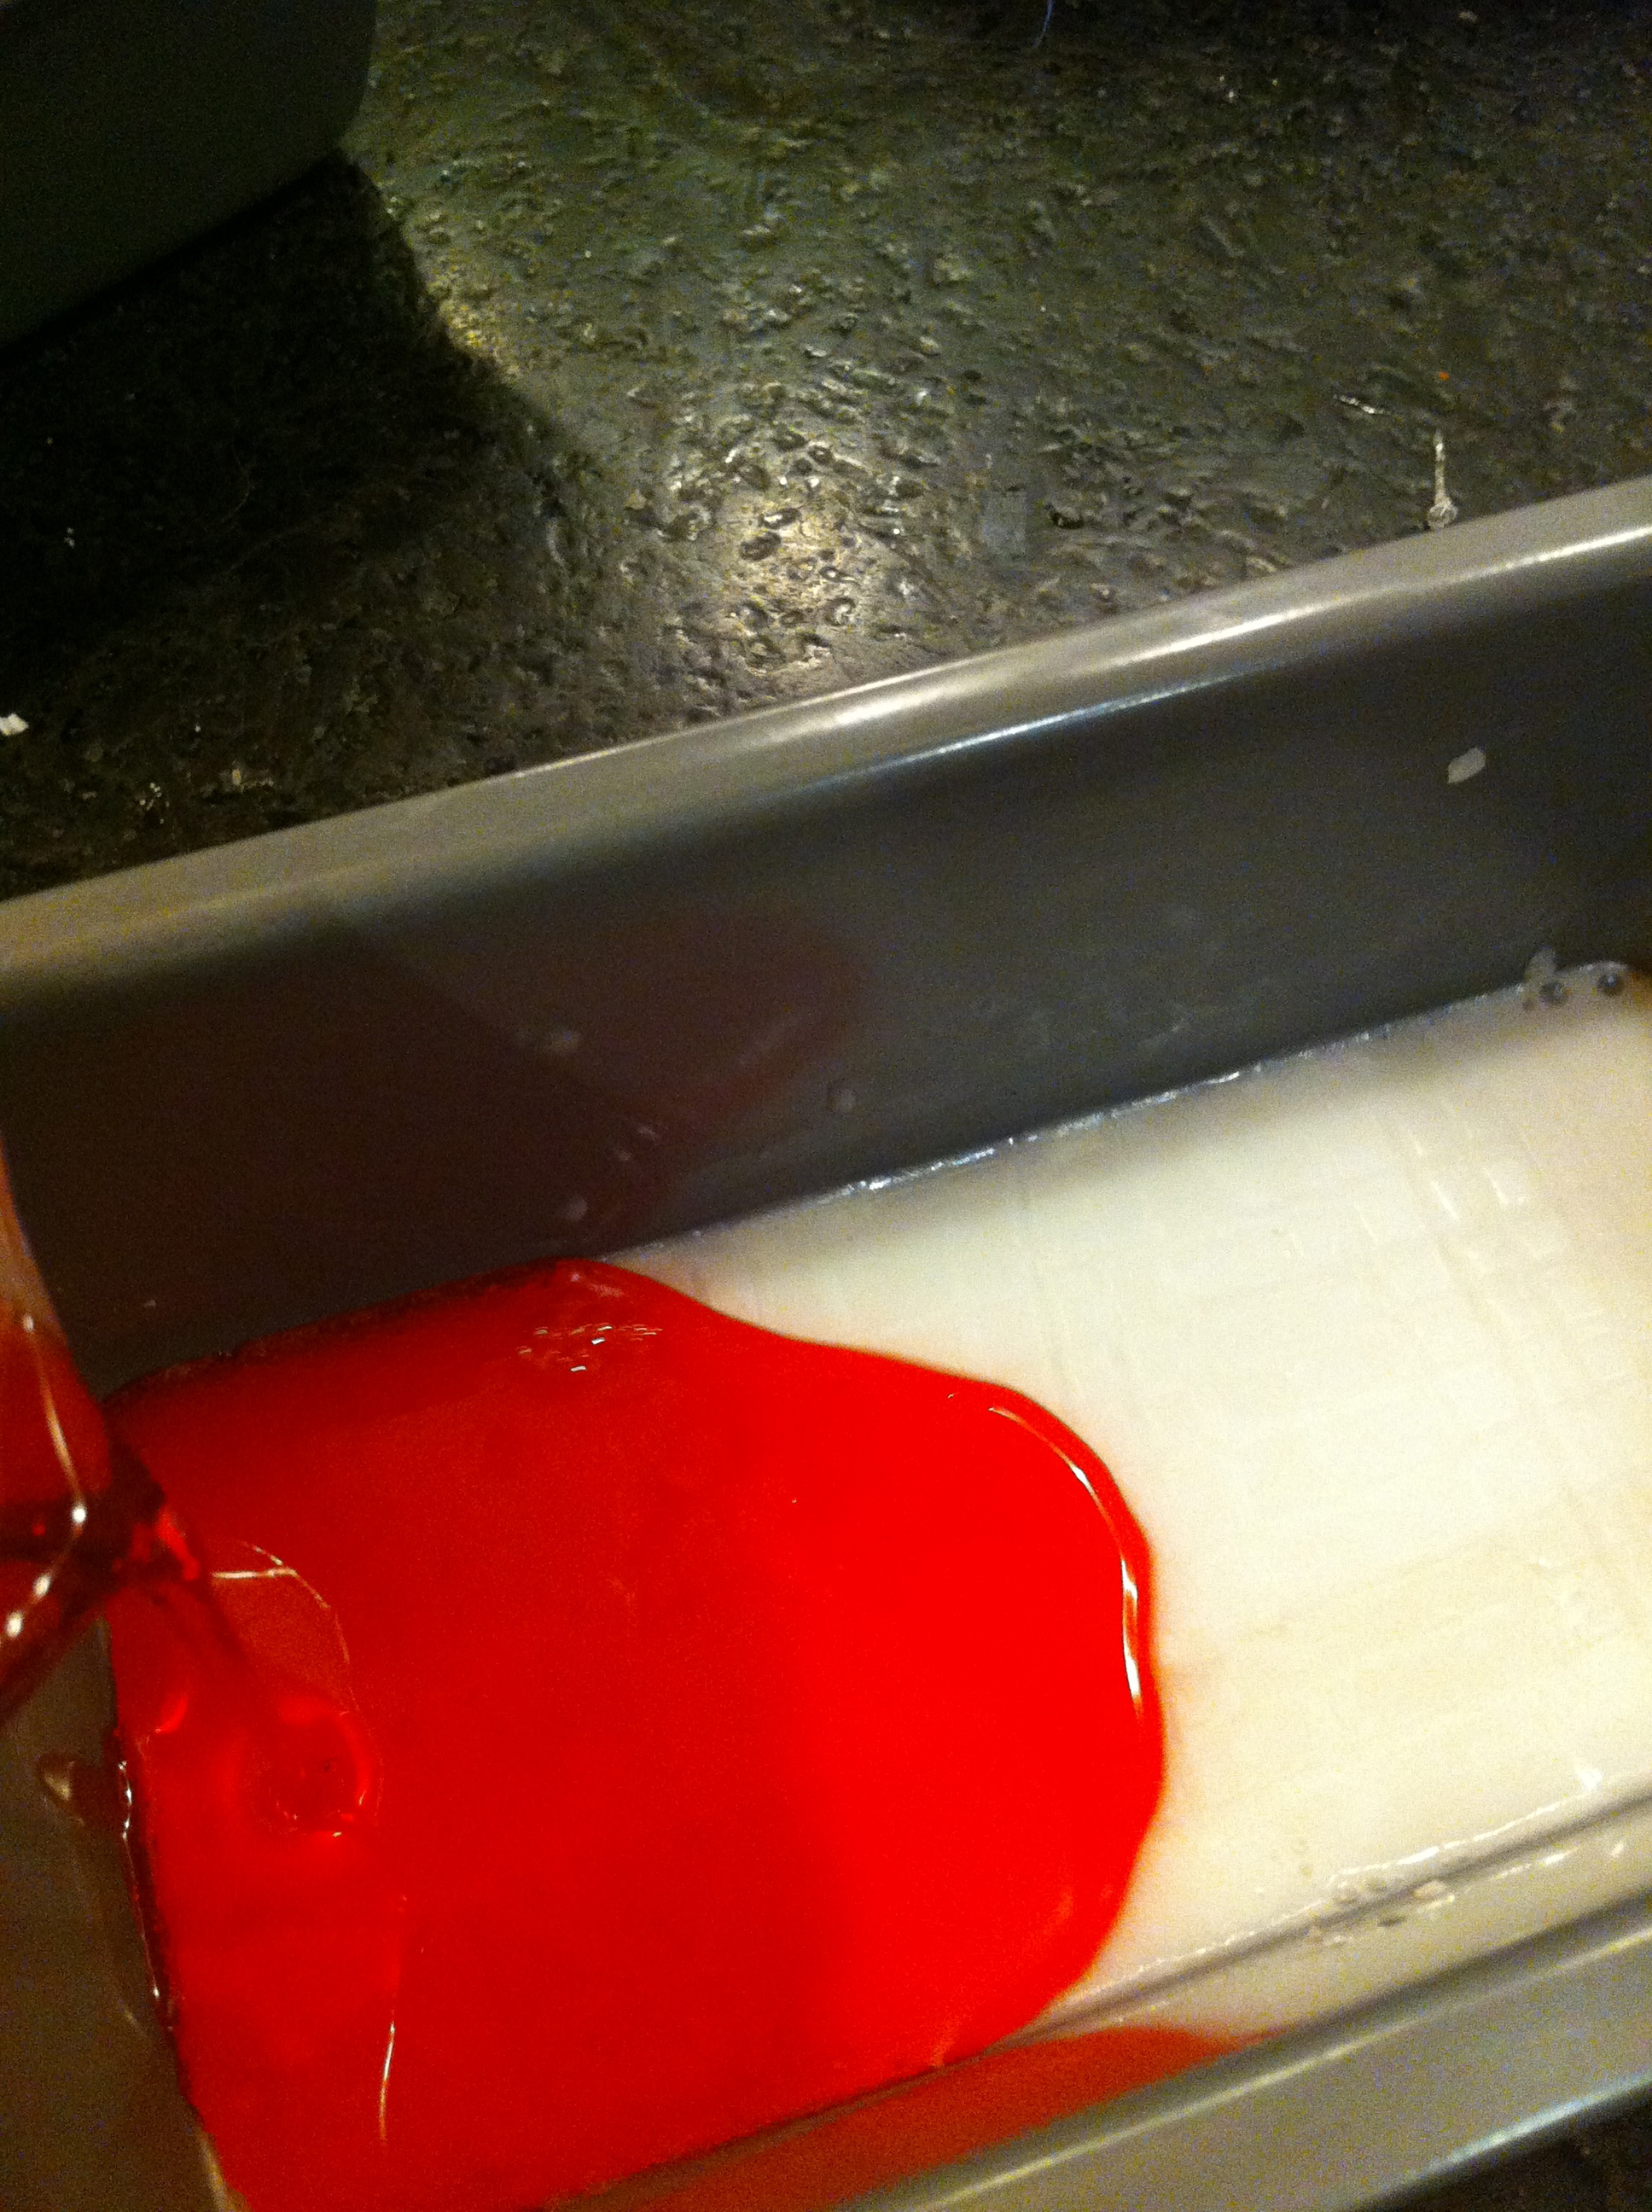
Microwave the white layer about 20 seconds to wake it up. Pour into the molds until they are half-full. Spray the surface with alcohol to remove bubbles.

Pour the clear layer into the molds until they are full. With toothpicks, swirl the colors together. Spray the surface again with alcohol. Let the soaps fully cool and harden, then pop out of the molds.

Bloody Dragonflies

Failed attempt #13
Failed attempt #13

And bloody they are.  It took me twenty-eight attempts and a video tutorial from my cousin Donna to master this damn stitch. I found it on Freeknitstitches.com via Pinterest and whoever wrote the directions is just plain mean. Here they are as lovingly deciphered, decoded and put down by Donna, with a few tweaks by yours truly for those of us who like everything spelled out.

Dragonfly Lace Stitch

Cast on 16 stitches

Row 1:  P2, K4, K2tog, YO2, Sl1, K1, PSSO, K4, P2

Row 2:  K2, P3, P2tog, Slip 1 of the YO's purlwise, YO2 purlwise, Slip the other YO purlwise, Sl1, P1, PSSO, P2, K2

Row 3:  P2, K2, K2tog, drop all the YO's off the left needle - there should be 2 long strands; take them up with your right needle, YO2 knitwise, then go under the YO's again; Sl1, K1, PSSO, K2, P2.

Note: at this point, the slipped loops and the YO's in the middle make what Donna and I call THE TANGLE. THE TANGLE is ugly but don't let it frighten you. THE TANGLE is a metaphor for life, just keep going and it will work out in the end.

Row 4:  K2, P1, P2tog, drop THE TANGLE off the left needle , it is now 3 strands; take them up with your right needle, YO2 purlwise, then go under THE TANGLE again; Sl1, P1, PSSO*, P1, K2

Row 5:  P2, K2tog, drop THE TANGLE which is now 4 strands; take them up with your right needle, YO2, then go under THE TANGLE again; Sl1, K1, PSSO, P2

Row 6:  K2, P1, 4YO cast-on style**, drop THE TANGLE and P1, K1 into it - keep tension as even as possible and pull tight as you are doing the final "draw-up" of the wings; 4YO cast-on style, P1, K2

Row 7:  P2, K12, P2

Row 8:  K2, P12, K2

Row 9:  Same as 7

Row 10:  Same as 8

* On the even rows, this PSSO was a little tricky (for me) because that slipped stitch liked to "hide" under a long strand.  Just be sure you're passing the correct thing over.

** YO cast-on style—Donna had to show me what she meant by this.  You don't want to simply wrap the yarn around 4 times, it will all fall apart in the next row.  Do a yarn over the right needle, then take that loop off, turn it 180 degrees, and put it back on the right needle.  Repeat 3 times.  If that doesn't make sense, give me a holler, I'll try to explain better.

So the Dragonfly is 16 stitches wide. I attempted a double swatch with 2 lead off knits, 2 knits in the center, and 2 ending knits, so I cast on 38 stitches total. Those 6 knits are always knit, odd and even rows. 

This is one that takes a ton of practice, I'm still not happy with the final P1, K1 into THE TANGLE on row 6, I wish I could get it tighter.

If you try this and find it incredibly difficult and frustrating, do tell me about it, please! Remember it took me twenty-seven times to finally get it so don't get discouraged.

If you breeze right through it on the first try, I don't want to hear from you.

Paint Swatch Art: Fall Tree

If you want to lose an hour of your life, search "Paint Swatch Art" on Pinterest. Don't say I didn't warn you. Nobody warned me, next thing I know Panda and I are skulking out of Home Depot with an innocent 5 or 6 swatch cards in our hands, but about 200 more stuffed in my purse. How many can one take before it qualifies as theft?

Anyway, Panda wanted a heart punch and a butterfly punch. I already have a heart one, I think I may have three, that's another post. As for the butterfly, we found this awesome 3-in-1 layered punch by EK Success and it's great with the paint swatches because the colors are already coordinated for you.

I got a little oak leaf punch. I had picked out mostly fall swatch colors; I had a very specific vision of a tree collage I wanted to make. It's sort of my take on Marimekko. Possibly Marimekko meets Ikea. Marimekkea?

There are so many great ideas out there for paint swatch art: making garlands out of punched shapes, folding them into little boxes, framing them under glass to make a dry-erase calendar. A lot of teens copy lyrics or inspirational sayings onto them. They are very fun things to have around. And very (cough) reasonably priced.

So here are our projects and my warning. Let's be careful out there.

20130924-230112.jpg
20130924-230112.jpg

Valentine Lollipop Covers

It's nearing Valentine's Day which means the floor by my desk is a disaster area. I send my girlfriends love notes on the 14th. I like Valentine's Day to be about the message. It kind of drives me crazy how it's become a second Halloween in the schools but I play nice. These lollipop "matchbook" covers are quick, cute and easy, and they satisfy my need for things to be handmade with kids' need to be sugary.


For your generic lollipop, a piece of cardstock 2 3/4" wide and 6 1/2" long will do the trick. Score at the 2 3/4", 3 1/8" and 5 7/8" mark.

You need to punch a hole in the center of the thinnest section for the stick of the lollipop to go through. A hole punch seems the obvious answer, but unless you have one of those special long-nose kind, it won't reach to the center. Among my more obscure craft supplies is this hand punch, hammer and setting mat. I think it's to set eyelets. Tell you what: I'll just leave you to fend for yourself on this step.

The cover is now made, now you just need a little (or a lot) of decoration for the front. Redman's sole directive is that his Valentines not be too "lovey mushy". So we went through my drawers of rubber stamps and he picked this friendly one, to be stamped in brown and blue ink.

We mounted it on red paper and stuck it to the front. Then slide the stick of the lollipop through the hole and stick down the flap in the back. Done and done.

Panda adopted the same matchbook design, but skipped the lollipop in favor of a single heart-shaped chocolate. These go to her girlfriends as there seems to be an indefinite hiatus on boys receiving Valentines.

Fine by me.

Sweets to the sweet.

Christmas Crafts: Peppermint Stripe Soap

Don't run away. You can do this.

Get back here! You can SO DO THIS. It will cost you about $20, take two evenings tops, and in the end you will have awesome homemade gifts to give to teachers, babysitters, friends and aunts.

I know, you have two questions: when do I have time? (I won't answer that) and how do I come up with these things? (I will answer that!) This particular idea came from The Binder. It holds all the cool ideas I find in mags like Martha Stewart Living and Real Simple, most of which I'll never end up doing, but it's nice to know they're there. 

One of the things I've actually done is this peppermint stripe soap. Panda gave them as teacher gifts one year, and this year it's Redman's turn to make them.

The materials are readily available at any craft store: head toward the section for candlemaking, the soap stuff is usually right next door. You will need:

  • A pack of white glycerine soap
  • A pack of clear glycerine soap
  • Peppermint soap fragrance OR peppermint essential oil. Essential oil you will probably need to get at a health food store, but may be worth the extra trip for you because its fragrance is superior to the synthetic soap stuff.
  • Red and white soap coloring. Red food coloring also works. The white is NOT necessary, it's just that the red layers tend to bleed into the white ones, so I like to give the white a little boost.
  • 2 cheap microwave safe measuring cups
  • 2 mini-loaf pans
  • Popsicle sticks or wooden skewers for stirring
  • A spray bottle filled with rubbing alcohol

You will need 1/4 cup glycerine for each layer of soap. The glycerine usually comes pre-scored and through trial-and-error we found that 3 squares = 1/4 cup.

Cut 3 squares of white glycerine into smaller pieces, place in measuring cup and microwave at 20 second intervals until completely melted.

Add about 20 drops of synthetic fragrance to melted glycerine and stir. If using essential oil, add 5 drops at a time until you get the level of scent you want. Remember every white layer will have fragrance added so less is more.

Pour white soap slowly into one loaf pan—the slow pour avoids bubbles. Cut off another 3 squares of white, repeat process to fill other loaf pan. Let pans sit about 15 minutes to set.

Take a fork and score the surface of the white layer, lengthwise and crossways. Pick out all the little scraps of white, then spray the scored surface with rubbing alcohol. This process helps the layers adhere. 

Cut off 3 squares of clear glycerine and melt in microwave. Add red food coloring and stir until it's the shade you want. Pour slowly on top of white layer in one loaf pan. Melt another 3 squares, color, stir and pour into other pan.

Again, let sit for at least 20 minutes. Before adding the next white layer, score with a fork, tap out the shreds and spray with alcohol.

And so repeat, alternating red and white until the pan is filled. Let sit for at least 4 hours, preferably overnight, in a cool place.

The soap will release easily from the pan if you put it in the freezer for 20 minutes. Hold the pan upside down, pull away the sides, press on the bottom with your thumbs, it should come right out. If it doesn't, I don't know you, this conversation never happened.

Let the soaps come back to room temperature. With a sharp knife, cut the soap into slices, slide into cellophane bags. Martha says to tie with bakery string but I don't know where you procure that. Just tie with whatever you have, make some kind of label and be sure to tout the fact that this is a HANDMADE GIFT.

Store soaps in a cool, dry place until ready to bequeath to someone you love.

You rock. How do you think of these things?

Christmas Crafts: Felt Tree Garland

I really do try to keep the Christmas Crafting in check, otherwise I end up with more doodads than I have places to put them. But this year we're moving some Christmas to the TV room downstairs, which goes hand-in-hand with a massive hauling out of old toys and junk, and surgery on our chimney so that maybe, finally, we can build a fire in the fireplace without filling the house with smoke. And suddenly there is a mantelpiece in need of its own little bit of holiday decor. Weird how that happens.

I found this tutorial at Noodlehead.com for a really adorable garland of felt trees that requires not much more than brown and green felt, and scrap holiday material. It doesn't even have to be holiday-themed. She used Liberty prints which were perfectly adorable.

This was a 2.5-evening project over the holiday weekend: Friday evening I cut out all the trees (you need 2 pieces of felt and one piece of fabric for each). Saturday evening I sewed and stuffed. Sunday afternoon I put it together. And I love it.

You can make the garland, or make each tree into a hanging or standing ornament. These are super easy, a great project for first-time sewers of all ages, and the garland looks nice anywhere you hang it.

Punkin'

It's nearing the end of October. Commence holiday crafting!! (Like we need an excuse)

I got these fabric pumpkins out of an issue of Martha Stewart Living, many moons ago, and I love love love them. Once you make one, you can make a lot, and they are very conducive to "assembly line" tactics.

Everything you need to make these is probably already in your house, with one sole exception being a piece of specialized equipment called an embroidery needle. A LONG embroidery needle. You can do without it but when it comes time to wrap the pumpkin and shape the "ribs", a long embroidery needle can't be beat.

You will need:

  • Fun, autumnal fabric of any kind, color, texture, pattern.  Oranges and yellows are lovely but don't be afraid to experiment
  • Green and/or brown felt for the stem
  • Thread in all colors
  • Stuffing
  • Sewing and/or embroidery needles

(By the way, if you're wondering about my lurid orange-and-black nails, it's because I'd worked the school harvest fair that day, at the "Monster Manicure" booth)

Cut your rectangles.  The basic rule of thumb is that the rectangle should be twice as long as it is high. If the height is taller, it will be a tall pumpkin. If the length is longer, you will have a squatter, flatter pumpkin. Whatever size you cut, sew one short seam together. It's good to assembly line this because the rest of the project is hand sewing. You can sew a bunch of seams and then put the machine away.

With a regular sewing needle and thread, do a running stitch along one long side, about 1/4" from the edge. Pull the thread to gather the edges tight and then do some whip-stitches across the puckers to hold it in place. Turn the pumpkin right side out and stuff generously. Do another running stitch 1/4" from the top edge. Pull tight, get all the stuffing in there, and again, whip stitch across to keep everything tight.

Now you have your stuffed pumpkin.

Thread an embroidery needle with a generous amount, maybe two arm lengths. Do a few whip-stitches on the bottom side of the pumpkin to secure the thread—if you merely knot off the end it will pull right through the fabric.

Push the needle through the center bottom of the pumpkin, straight up through the top. Wrap the thread around the side—you can follow the wrinkles in the fabric that are already occurring as a guide, and then push the needle in through the bottom again. Up through the top, and pull tight, making the thread sink into the stuffing. Wrap around the side, in through the bottom, up top and pull tight. Repeat until the pumpkin looks the way you want it to. Whip-stitch and knot off like crazy at one end of the pumpkin.

For the stem, I start with a rectangle of felt about 2" x 3". I fold it in half lengthwise and then hold it up to the pumpkin to visualize how much I want to cut off. Cut a sort of rounded triangle, so it looks like a stained glass window when unfolded:

With scissors, round off the bottom corners of the stem. Thread a needle with green thread, hold the stem edges together, and start blanket-stitching down to close the seam. Sew to about 1/2" of the bottom and stuff lightly, leaving the 1/2" of bottom stem free. This unstuffed part gets spread out on the top of the pumpkin, hiding all your sloppy whip-stitchery, and you blanket-stitch around it, securing it to the top of the pumpkin.

Smoosh up the pumpkin, twist and fiddle with the stem until it looks the way you want it to. Awesome. These are so much fun. Quick, easy-to-make, and unlike those infernal paper ornaments, these are totally non-addicting. There is no need to make thirty of them. But you could. And I did.

Un Petit Livre

From May to September I move my laptop upstairs to the dining room table. This is because the dining room has the best view of the yard, and with all the work I put into my gardens every spring and summer, I want to be able to see them. My office downstairs has no windows. So I work upstairs and make a mess of one end of the table, and then every fall, right around this time, I move back downstairs, get reacquainted with my desk and all my craft supplies and get itching to make something. 

Today I made a book:

Isn't it cute? I made it during my lunchtime, it took like 10 minutes. I have no idea what to do with it, so I'm letting Panda take it to school tomorrow to see what her friends think.

I got the tutorial off How About Orange which is one of my very very favorite blogs. Jessica has no end of clip-arts and crafts and free downloads and projects. If you have a love of paper (I'm looking at you, Kelly) I highly suggest going to check her out. She actually got this little book tutorial off Paper Kawaii, another awesome site for paper crafts. That tutorial goes step-by-step with pictures so I'm not going to transcribe all the instructions here. I'll just give you my illustrated version of events.

You make one too. You can do it. And then tell me what you'll do with it because I still have no idea.